Tuesday, May 27, 2008

Experiments with the Orton Effect in Photoshop

After my post a couple of days ago about discovering the Orton Technique I found a couple of shots I thought were good candidates to play around with it on. I did the first image, liked it so much I immediately recorded the action and then applied it to a couple of other images. It's a bit gimmicky yes, but if you've got a bit of a "meh" shot, maybe something like this can take it up a notch and give the right scene that dreamy quality.

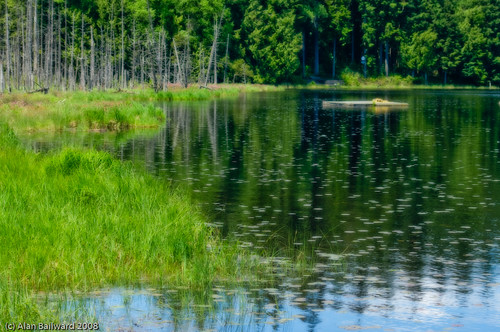
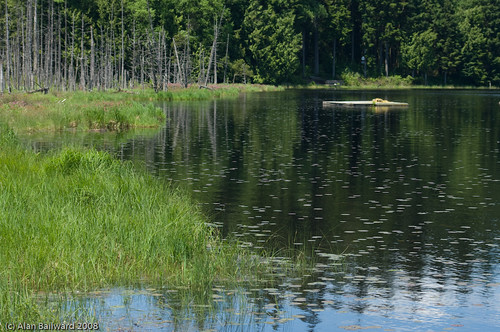
This first image was "Ok", a shot of the edge of Whonnock Lake. It's got a bit of an S-curve, follows the rule of thirds fairly well, and has something off on the right (the floating dock). I'd have liked something a bit more in the foreground, but hey, I'm still learning. The main issue with this image I think is it's fairly flat (though feel free to tell me how it'd have been improved).

Orton Experiment 1 (Before)

Running it through the orton action gave me what's below.

Orton Experiment 1 (After)

While still not a winner compositionally, note how things pop out, especially the green, and how the right hand side is filled in with reflections from the trees. The sky in the lower part of the image also doesn't seem to get as lost with a bit of contrast between it and the green of the tree reflections in the water.

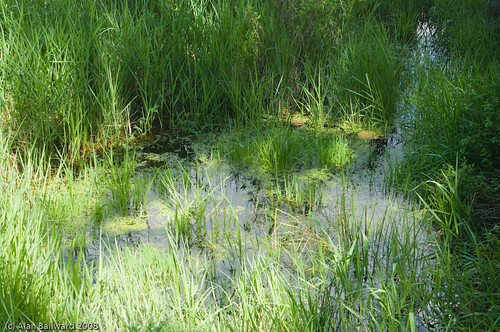
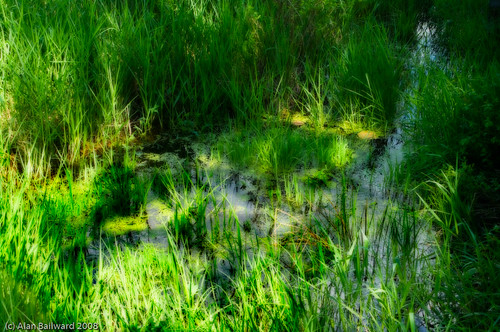
A second test is below. Before image:

Orton Experiment 2 (Before)

And after:

Orton Experiment 2 (After)

Again the after image still needs "something" (maybe a different color, or object of focus), but it's gone from a boring picture of green, to a mash of all shakes of green and black. Note that the method of using screen and multiply blend methods left the lower left of this image fairly "hot" so I toned it down with a levels adjustment restricted with a layer mask to only the very bright areas.

To do this on your own images, just hit this great tutorial page on pic.net and follow it as written, works great!

Comments or suggestions appreciated as always (assuming I have more than 3 readers of course)!

Monday, May 26, 2008

A (Decent) HDR

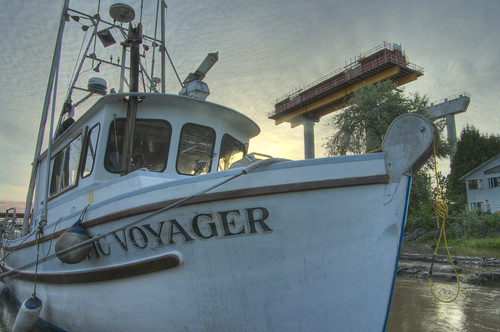
Well, I think so anyway. This is one of the few HDR images that I've done that I've liked, with a half decent composition and a good candidate for HDR-ness. This was taken from a dock at the bottom of the new bridge construction from Maple Ridge over to Langley.

Boat and Bridge HDR

This was taken handheld in a series of 5 bracketed images at +/- 1.5EV (so -3, -1.5, 0, +1.5, +3). Probably overkill, but for playing around it worked fine. The images were combined in Photomatix and some minor post processing (removing the boat's serial number) was done in Photoshop.

The Orton Technique

This is something I hadn't heard of before, I saw it in the comments of this article, asking the question of the best photography tip you ever received. The two links I found about it that seemed to show it very nicely were:

Of course there's more out there, along with the flickr search for all images tagged with orton. I saw this originally at the Abbotsford Photography club done with slide film. Not a technique for all images, but very very cool looking.

Friday, May 23, 2008

Photowalks - Gastown

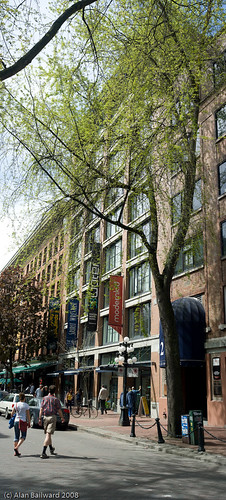
First in a couple to be posted over the next few days. These images were from a photowalk I did with a coworker through Gastown in downtown Vancouver. Hit the image to get the flickr page with a description and larger views. They are both fairly large panoramas created from 9 and 12 images shot handheld and assembled with PTGui.


Gastown Panorama

Gastown Tree

I'm very impressed with what PTGui can deal with. Both images had minor tweaks after the fact, the first one had a power line removed and the license plates blurred, the second a minor levels tweak. I'm very impressed with the size of the first one as well, about 45mp when put together!

Tuesday, May 20, 2008

Wedding Photo Advice

Digital Photography has a good article and images regarding using the one location technique for wedding photography. The gist of it all comes down to this:

Too often novice wedding photographers operate on the idea that varied shots are captured only by varied locations. This is simply not true! Don’t fall into this trap! One well-lit window can provide a plethora of beautifully varied shots to satisfy both you and the bride.

The rest of the article is good and has lots of good info for wedding photographers, and in fact, anyone doing portrait shoots. If I'd known this doing my sweet 16 shoot, I wouldn't have been running around the property as much as I was.

Saturday, May 10, 2008

My First "Sweet 16" Portrait Shoot

A while back an ex-coworker from a job ago emailed me to ask if I'd take portraits of her daughter's "Sweet 16" party. The description was fairly vauge.... "fun shots of the kids dressed up". Since this was a friend of mine, and because my experience with portraiture is practically nil, I of course immediately said "let me get back to you" :) After a while I of course agreed, and this afternoon I went out to their country home to "shoot the kids".

First the good stuff. The kids were awesome, patient and willing to go along with this weird guy taking pictures of them, and I'm glad that their mom was there as she was able to corral everyone nicely and move from place to place... lets just say she knew what she wanted and dammit her daughter's sweet 16 was going to be perfect! The environment was great as well, their yard is beautiful, and being spring had flowers and blooms everywhere.

However, for lighting, the conditions couldn't have been worse, especially for a newbie like me. First of all it was overcast, and as I chose to shoot with a flash this meant that these shots had a dark background. The kids were nicely exposed, but they were sitting in a pool of light with bladk behind them.

Speaking of kids, they were about as contrasty as you can get, 4 white kids in black tuxes and dresses... also one of them didn't have a tux jacket so he just had a white shirt on.... about the same challenge that a wedding photographer has with a black tux next to a white wedding dress.

My flash (the AF360FGZ) did it's best, but either it or it's operator seemed to manage to underexpose about every image by about 2.2 stops :( Maybe it was the black tuxes, operator error.... It just seemed that the shots were all really dark, or they had white blobs of overexposed faces on top of darkness. I'm really glad I shot in RAW, as that combined with Lightroom's excellent exposure controls has allowed me to recover most of the shots, it seems the dark ones respond fairly nicely to exposure of +1.8-2.2 and a hit of fill light around +19 to bring out some of the background and the details in the suites.

Not a huge loss after all thank goodness :) The first pass on the images I've been making shows that most are recoverable, and some are actually not bad.

Things to remember for next time.

  • Consider not using a flash. Better yet, remember how to set it to only do fill flash mode, instead of just on P-TTL or the high speed sync mode.
  • Take test shots first to get the lighting and exposure right. The LCD will not give you the full story. Luckily I had the over/under exposure warning set, so I could see when the really-dark turned into pure-black, but the rest of the images were for the most part, still too dark.
  • Taking the time to zoom in and check the histogram would have avoided some stress.
  • Scope out the area ahead of time if possible. They have a gorgeous yard that I wasn't able to take full advantage of.
  • Get closer, get closer, get closer! Then get a bit closer. I'm so glad I have 14mp to work with!
  • I have to learn to know what looks good and how to get people to do it for me. Again, thank goodness that her mom was there and had an idea of what she wanted.
  • Remember to look for / fix the oven mitt hands.
  • Details, details, details.... I avoided trees growing out of heads for the most part, but little things like one person having their feet or hands pointed in a different direction than everyone else can take a picture down a notch.
  • Get more lines to get people to relax.... I think I used "pretend you like each other" about 30 times. First time good, 30th probably just annoying. I'll have to get a set of billy bob teeth to get a laugh.
  • Will HDR work to fix the white shirt / black dress issue? Hmm....
Will update when all the post-processing is done and will post some results when/if I get permission from parents in the form of a model release.
Monday, May 5, 2008

Squamish Favorites

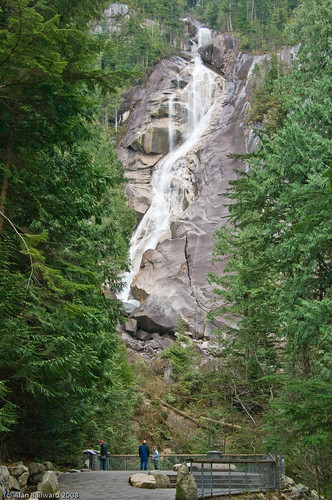
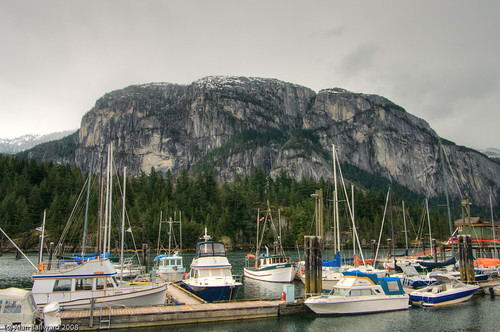
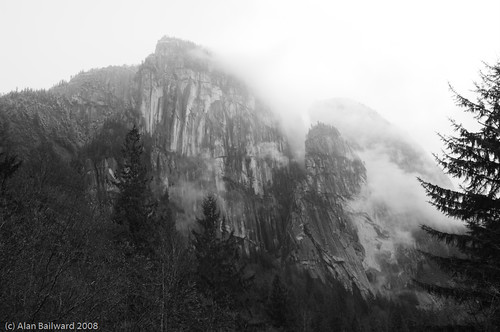
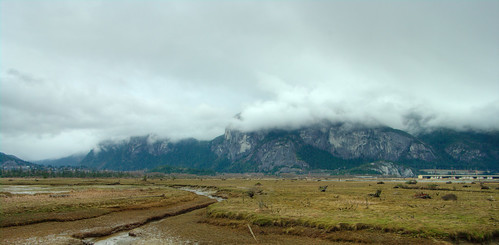
A couple of months ago I went up to Squamish (click link for google map of the area) for a photo-walk. A couple of friends up there took me around to various spots that you might not find if you're not from around there. Here are a few of my favorite shots.

Shannon Falls:

The Squamish Chief and the Squamish Yacht Club:

The Squamish Chief from Magnolia Drive (or thereabouts):

The Chief and surrounding area from the peninsula:

Comments and critisism always welcome. Hope you enjoyed the pictures. You can see these and more on my flickr squamish feed.